
Pointillism might look like “the tiny dot technique,” but any pyrographer who has tried it knows the truth: those tiny dots hold power. They add texture, depth, softness, realism, and even emotion depending on how you place them. They can make fur look touchable, feathers look airy, bark look rugged, and stone look ancient. They’re subtle, but mighty.
If you’re new to pointillism in pyrography or you’ve dabbled without really understanding the mechanics, buckle up. This is one of the most calming, meditative, skill-building techniques you can add to your wood-burning tool belt.
And yes, it’s also a test of patience. But the good kind, the kind that makes you slow down, breathe deeper, and slip into that timeless creative flow.
What Exactly Is Pointillism in Pyrography?
At its core, pointillism means building an image using individual dots. Instead of strokes or heavy shading, you’re tapping or pressing the heated pen tip into the wood to create marks. When used intentionally, pointillism becomes a powerful shading method without the risk of streaks or blotchiness.
Each dot represents:
- A piece of texture
- A level of tonal value
- A moment of control
- A choice
Pointillism basically forces you to make thousands of tiny decisions, but the payoff is gorgeous.
Why Pointillism Is Worth Mastering
Most beginners either love pointillism immediately or avoid it like laundry day. But here’s the truth: mastering pointillism improves everything else you do in pyrography.
It teaches you:
- Heat control — Too hot, and you scorch. Too cool, and your dots disappear.
- Pressure control — Light pressure equals soft warmth. Firm pressure gives dark drama.
- Patience and rhythm — A hallmark of all great wood-burning artists.
- Texture creation — Nothing beats pointillism for fur, sand, stone, leaves, or stippled shading.
If line work is structure, and shading is mood, pointillism is the detail that pulls your viewer closer, literally inviting them to look again.
How Pointillism Creates the Illusion of Depth
The magic of pointillism comes from something your brain does automatically: it fills in the gaps.
When dots are:
- Close together → the area reads as darker.
- Spread apart → the area reads as lighter.
- Layered gradually → you get a smooth gradient without touching a shader tip.
That’s why pointillism is such a forgiving shading method. Mistakes don’t scream. They whisper.
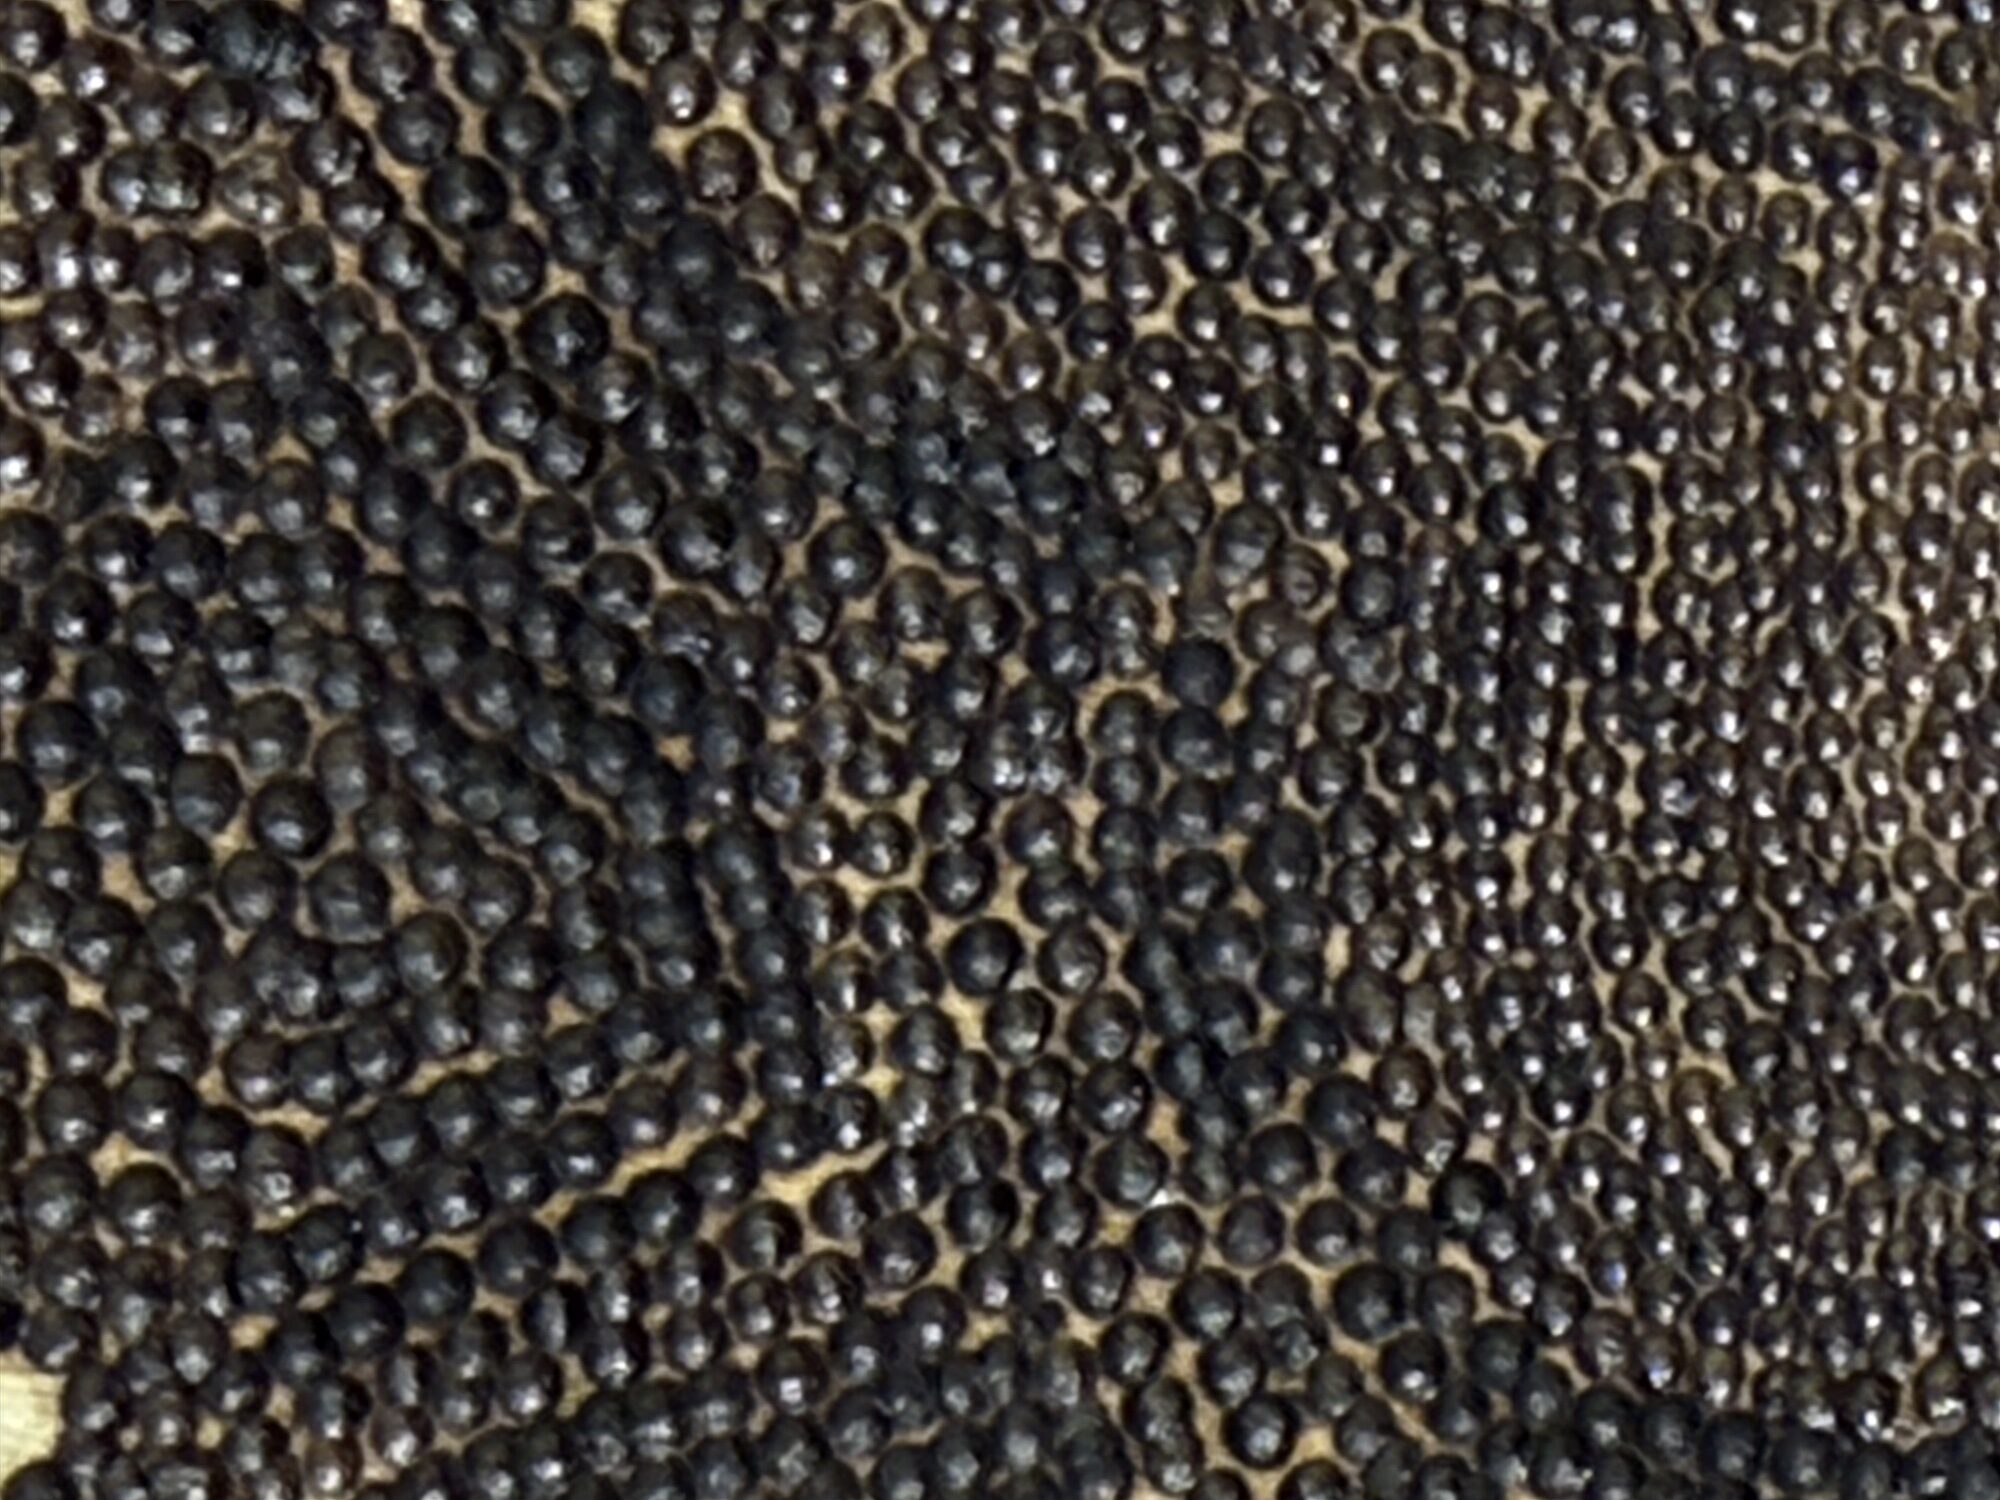
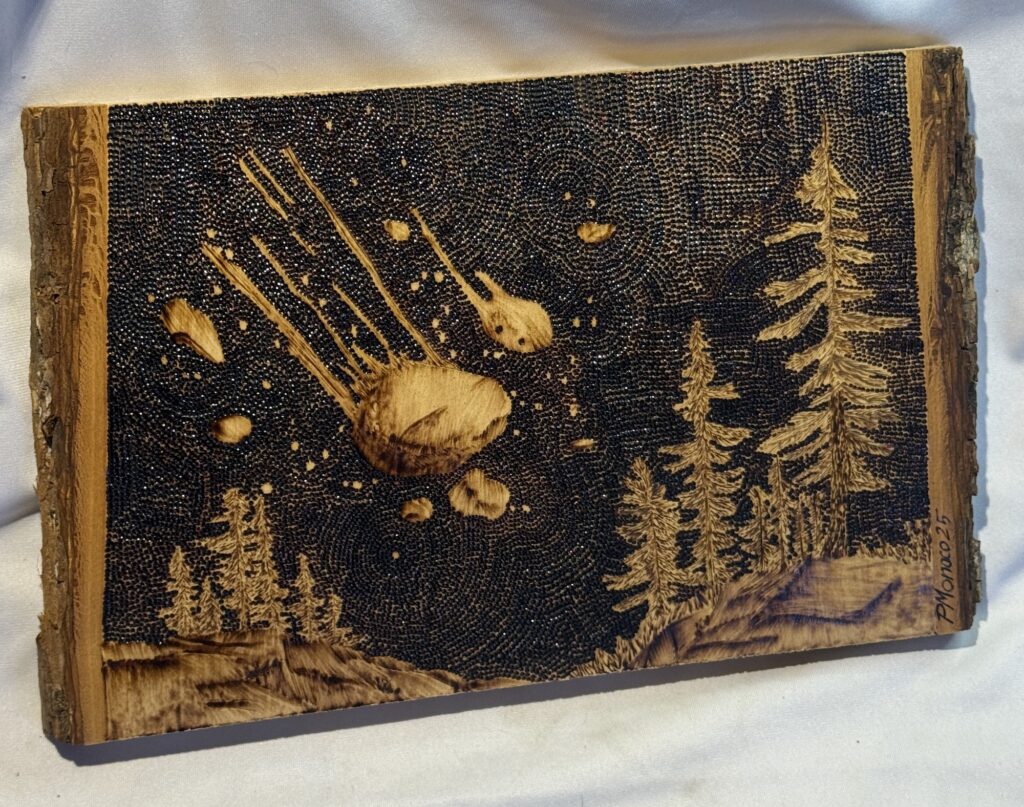
I used pointillism for the background in this explosion in the sky piece from the 52 Weeks of Fire Project.
Pointillism Techniques Every Pyrographer Should Learn
1. Controlled Stippling
This is your “basic dot.” Even spacing. Even pressure. Controlled depth.
Practice until the dots look consistent, like a pattern, not a crime scene.
2. Gradient Dots
The art of going from dense to sparse without letting the transition get choppy.
This one improves your shading instantly.
3. Directional Pointillism
Dots that follow the shape or flow of an object:
- curve around an eye
- follow the grain of a feather
- wrap around a sphere
- move along a petal
These directional dots create movement and realism.
4. Mixed Density Texturing
This is where pointillism becomes texture heaven. You can mimic:
- soft fur using clustered dots
- stone texture using random density
- tree bark using inconsistent spacing
- delicate petals using evenly spaced soft dots
The variety is endless.
Practice Drills That Actually Build Skill
You don’t learn pointillism by hoping you get better. You learn it by burning dots until the technique feels intuitive. Try these:
Drill 1 — Fill the Square
Burn a 1-inch square with perfectly even dots.
This builds control — and character.
Drill 2 — Dot Gradient Strip
Create a strip from darkest to lightest using only dots.
You’ll instantly see how spacing affects value.
Drill 3 — Dot-Only Object Study
Pick a simple object and render it only with pointillism:
- a leaf
- a feather
- a mushroom (unless you’re boycotting them)
- a pebble
You’ll learn how to use dots to create shape, dimension, and form.
Drill 4 — Texture Sheet
Fill a board with different textures using only pointillism.
It becomes your reference library later.
Common Pointillism Mistakes (and Easy Fixes)
Mistake 1: Using Too Much Heat
High heat creates craters, not dots.
Fix:
Lower the temperature and take your time.
Mistake 2: Pressing Too Hard
Your dots turn into ovals or scorch marks.
Fix:
Lighten up. The heat should do the work.
Mistake 3: Inconsistent Pressure
Some dots look like bold statements. Others look like timid whispers.
Fix:
Practice pressing consistently — warm-up drills help.
Mistake 4: Clumpy Clusters with Harsh Edges
Your gradient looks like polka dots instead of shading.
Fix:
Gradually widen spacing to create soft transitions.
Why Pointillism Is Meditative
Once you get into a rhythm, pointillism becomes almost hypnotic. Dot. Breathe. Dot. Breathe.
Your pace slows. Your focus tightens. Your mind settles.
It’s not just technique, it’s therapy.
Want More Bite-Sized Pyrography Tips?
Get my Burn Letters email, quick lessons, creative prompts, and honest behind-the-scenes notes from the woodshed. No noise. No overwhelm. Just sparks for your creative fire.

